前面两篇文章已经分别介绍了如何使用Accompanist在Jetpack Compose中获取设备权限,还有如何使用CameraX进行照相预览,此篇文章为这个系列的第三篇:
- 《在Jetpack Compose中使用Accompanist获取设备权限》
- 《在Jetpack Compose中使用CameraX进行照相预览》
- 《在Jetpack Compose中使用CameraX对相机截图操作》(本文)
- 《在Jetpack Compose中从图库选择照片》
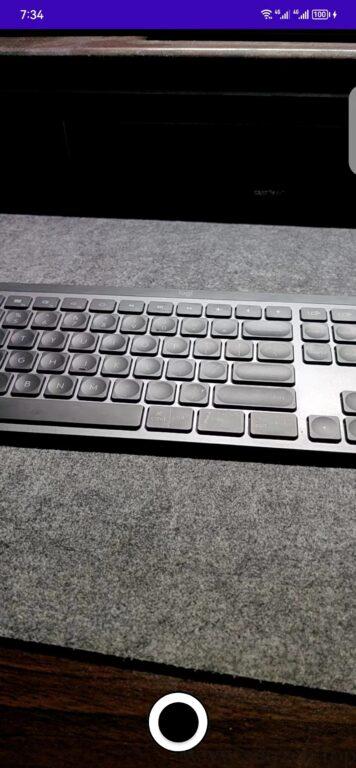
我们需要在相机预览界面添加一个按钮,用来截图操作:

首先创建一个按钮的Compose函数:
@Composable
fun CapturePictureButton(
    modifier: Modifier = Modifier,
    onClick: () -> Unit = { },
) {
    val interactionSource = remember { MutableInteractionSource() }
    val isPressed by interactionSource.collectIsPressedAsState()
    val color = if (isPressed) Color.Blue else Color.Black
    val contentPadding = PaddingValues(if (isPressed) 8.dp else 12.dp)
    OutlinedButton(
        modifier = modifier,
        shape = CircleShape,
        border = BorderStroke(2.dp, Color.Black),
        contentPadding = contentPadding,
        colors = ButtonDefaults.outlinedButtonColors(contentColor = Color.Black),
        onClick = { /* GNDN */ },
        enabled = false
    ) {
        Button(
            modifier = Modifier
                .fillMaxSize(),
            shape = CircleShape,
            colors = ButtonDefaults.buttonColors(
                backgroundColor = color
            ),
            interactionSource = interactionSource,
            onClick = onClick
        ) {
            // No content
        }
    }
}
之后我们改造下之前的CameraPreview函数:
@Composable
fun CameraPreview(
    modifier: Modifier = Modifier,
    scaleType: PreviewView.ScaleType = PreviewView.ScaleType.FILL_CENTER,
    onUseCase: (UseCase) -> Unit = { }
) {
    AndroidView(
        modifier = modifier,
        factory = { context ->
            val previewView = PreviewView(context).apply {
                this.scaleType = scaleType
                layoutParams = ViewGroup.LayoutParams(
                    ViewGroup.LayoutParams.MATCH_PARENT,
                    ViewGroup.LayoutParams.MATCH_PARENT
                )
            }
            onUseCase(Preview.Builder()
                .build()
                .also {
                    it.setSurfaceProvider(previewView.surfaceProvider)
                }
            )
            previewView
        }
    )
}
我们再新建一个CameraCaputre函数:
@ExperimentalPermissionsApi
@ExperimentalCoroutinesApi
@Composable
fun CameraCapture(
    modifier: Modifier = Modifier,
    cameraSelector: CameraSelector = CameraSelector.DEFAULT_BACK_CAMERA,
    onImageFile: (File) -> Unit = { }
) {
    val context = LocalContext.current
    Permission(
        permission = Manifest.permission.CAMERA,
        rationale = "You said you wanted a picture, so I'm going to have to ask for permission.",
        permissionNotAvailableContent = {
            Column(modifier) {
                Text("O noes! No Camera!")
                Spacer(modifier = Modifier.height(8.dp))
                Button(
                    onClick = {
                        context.startActivity(
                            Intent(Settings.ACTION_APPLICATION_DETAILS_SETTINGS).apply {
                                data = Uri.fromParts("package", context.packageName, null)
                            }
                        )
                    }
                ) {
                    Text("Open Settings")
                }
            }
        }
    ) {
        Box(modifier = modifier) {
            val lifecycleOwner = LocalLifecycleOwner.current
            val coroutineScope = rememberCoroutineScope()
            var previewUseCase by remember { mutableStateOf<UseCase>(Preview.Builder().build()) }
            val imageCaptureUseCase by remember {
                mutableStateOf(
                    ImageCapture.Builder()
                        .setCaptureMode(CAPTURE_MODE_MAXIMIZE_QUALITY)
                        .build()
                )
            }
            Box {
                CameraPreview(
                    modifier = Modifier.fillMaxSize(),
                    onUseCase = {
                        previewUseCase = it
                    }
                )
                CapturePictureButton(
                    modifier = Modifier
                        .size(100.dp)
                        .padding(16.dp)
                        .align(Alignment.BottomCenter),
                    onClick = {
                        coroutineScope.launch {
                            imageCaptureUseCase.takePicture(context.executor).let {
                                onImageFile(it)
                            }
                        }
                    }
                )
            }
            LaunchedEffect(previewUseCase) {
                val cameraProvider = context.getCameraProvider()
                try {
                    // Must unbind the use-cases before rebinding them.
                    cameraProvider.unbindAll()
                    cameraProvider.bindToLifecycle(
                        lifecycleOwner, cameraSelector, previewUseCase, imageCaptureUseCase
                    )
                } catch (ex: Exception) {
                    Log.e("CameraCapture", "Failed to bind camera use cases", ex)
                }
            }
        }
    }
}
再对ImageCapture方法扩展一个takePicture的功能:
suspend fun ImageCapture.takePicture(executor: Executor): File {
    val photoFile = withContext(Dispatchers.IO) {
        kotlin.runCatching {
            File.createTempFile("image", "jpg")
        }.getOrElse { ex ->
            Log.e("TakePicture", "Failed to create temporary file", ex)
            File("/dev/null")
        }
    }

    return suspendCoroutine { continuation ->
        val outputOptions = ImageCapture.OutputFileOptions.Builder(photoFile).build()
        takePicture(
            outputOptions, executor,
            object : ImageCapture.OnImageSavedCallback {
                override fun onImageSaved(output: ImageCapture.OutputFileResults) {
                    continuation.resume(photoFile)
                }

                override fun onError(ex: ImageCaptureException) {
                    Log.e("TakePicture", "Image capture failed", ex)
                    continuation.resumeWithException(ex)
                }
            }
        )
    }
}
最后调用CameraCaputre:
class MainActivity : ComponentActivity() {
    @OptIn(ExperimentalPermissionsApi::class)
    override fun onCreate(savedInstanceState: Bundle?) {
        super.onCreate(savedInstanceState)
        setContent {
            PhotoAppWithCameraX_ComposeTheme {
                // A surface container using the 'background' color from the theme
                Surface(modifier = Modifier.fillMaxSize(),
                    color = MaterialTheme.colors.background) {
                    val emptyImageUri = Uri.parse("file://dev/null")
                    var imageUri by remember { mutableStateOf(emptyImageUri) }
                    if (imageUri != emptyImageUri) {
                        Box(modifier = Modifier) {
                            Image(
                                modifier = Modifier.fillMaxSize(),
                                painter = rememberAsyncImagePainter(imageUri),
                                contentDescription = "Captured image"
                            )
                            Button(
                                modifier = Modifier.align(Alignment.BottomCenter),
                                onClick = {
                                    imageUri = emptyImageUri
                                }
                            ) {
                                Text("Remove image")
                            }
                        }
                    } else {
                        CameraCapture(
                            modifier = Modifier,
                            onImageFile = { file ->
                                imageUri = file.toUri()
                            }
                        )
                    }

                }
            }
        }
    }
}
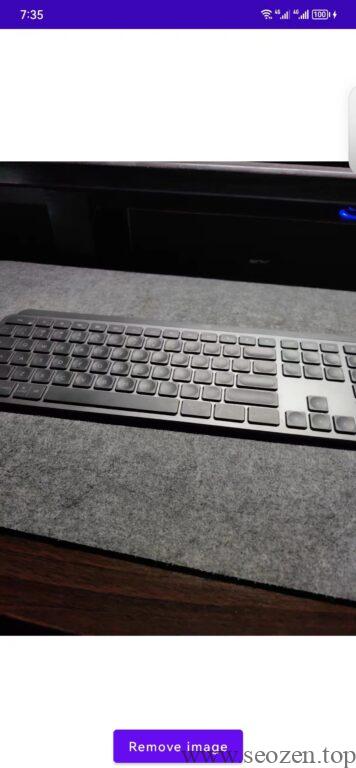
这里我们用到Coil这个库的rememberAsyncImagePainter方法来渲染图片,要在Module级别的build.gradle中引入Coil库:
implementation "io.coil-kt:coil-compose:2.0.0"
具体用什么版本,需要考虑你的Kotlin版本和Compose版本,可以看看Coil ChangeLog。
运行项目,你就可以进行截图操作,效果如下:

想要完整代码,请前往第二篇文章,到文章最底部的链接获取。
作者:SEO禅
本文链接:从零开始创建一个PhotoApp使用CameraX和Compose:在Jetpack Compose中使用CameraX对相机截图操作
版权申明:如无特殊说明,本站文章均为作者原创,著作权归作者所有。商业转载请联系作者获得授权,非商业转载请注明出处,谢谢!

